Although the Cisco VPN Client 5.x has been End-of-Support since July 2014, it is still widely used. Up till Windows 8.1 the program could be installed and would function properly. However, in Windows 10 the VPN client does not function … by default! There is a workaround to get the software to function.
Personally I would advise using the Cisco AnyConnect Secure Mobility Client v4.x. This program is fully supported by Cisco and functions under Windows 10. However, this client only supports SSL VPNs and remote access VPNs based on IKEv2.
In my experience many firewalls are still using remote access VPNs based on IKEv1. If you need the Cisco VPN Client 5.x for this reason, this document is for you.
Step 1
Obtain the latest Cisco VPN Client v5.x. This can be downloaded from http://www.cisco.com if you have the appropriate privileges.
Step 2
To be able to run the Cisco VPN Client you have to install a correct Deterministic Network Enhancer (DNE).
Download winfix.exe from ftp://files.citrix.com/winfix.exe, Install this file and run it.
If you already are on Windows 10, skip the following steps and jump to chapter ‘Additional steps for Windows 10 users’
If you are on Windows 8, download and install the latest DNE:
- For 32-bit OS go to ftp://files.citrix.com/dneupdate.msi
- For 64-bit OS go to ftp://files.citrix.com/dneupdate64.msi
- Reboot the computer.
Step 3
- Install the Cisco VPN Client
- Reboot the computer
Step 4
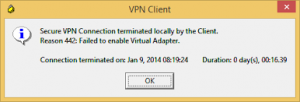
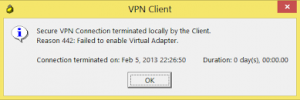
There is a possibility that you run into error ‘Reason 442’:

- To resolve this error, a Registry Key has to be changed.Open the registry editor (regedit)
- Browse to the following Registry Key:
HKEY_LOCAL_MACHINE\SYSTEM\CurrentControlSet\Services\CVirtA
- Modify the DisplayName
- For x86, change the value data from something like “@oem8.inf,%CVirtA_Desc%;Cisco Systems VPN Adapter” to “Cisco Systems VPN Adapter”

-
- For x64, change the value data from something like “@oem8.inf,%CVirtA_Desc%;Cisco Systems VPN Adapter for 64-bit Windows” to “Cisco Systems VPN Adapter for 64-bit Windows“
- Reboot the computer
Step 5 – Optional
Error reason 443 – Additional steps for Windows 10 users –
If you experience error ‘Reason 443’ after following the instructions above, follow these steps in the exact order.

- Uninstall any Cisco VPN software on the computer
- Uninstall any DNE updater software
- Reboot the computer
- Run winfix.exe again
- Reboot the computer
- In order to run the Cisco VPN Client you have to install a new Deterministic Network Enhancer (DNE) versin. This is part of the SonicWall Global VPN Client and can be downloaded in a 32-bit (http://www.gleescape.com/wp-content/uploads/2014/09/sonic32.zip) and a 64-bit (http://www.gleescape.com/wp-content/uploads/2014/09/sonic64.zip) version.
- Install the Dell SonicWall Global VPN Client
- Reboot the computer
- Install the Cisco VPN Client 5.x software
- Open the registry editor (regedit)
- Browse to the following Registry Key:
HKEY_LOCAL_MACHINE\SYSTEM\CurrentControlSet\Services\CVirtA
- Modify the DisplayName if it states the following:
- For x86, change the value data from something like “@oem8.inf,%CVirtA_Desc%;Cisco Systems VPN Adapter” to “Cisco Systems VPN Adapter”
- For x64, change the value data from something like “@oem8.inf,%CVirtA_Desc%;Cisco Systems VPN Adapter for 64-bit Windows” to “Cisco Systems VPN Adapter for 64-bit Windows“
- Reboot the computer
The Cisco VPN Client should now work in Windows 10.

